Instructions and exports
Instructions and booklets
Build steps, the timeline, the booklet Brickworks lays out from them, laying a page out by hand, and saving it as a PDF.
Build steps
A model's build steps are the order it goes together in. Press E as you build: what was put down since the last step becomes one. Build › Build steps moves the selected parts a step earlier (Shift+[) or later (Shift+]), makes a step of them (Shift+N), and moves the step the timeline is on earlier (Alt+[) or later (Alt+]), merges it with the next (Alt+E) or deletes it (Alt+Delete).
Any step in one go
Under the timeline's slider is a row of the steps, one box a step. The steps the selected parts are in are marked in yellow: drag that mark onto any other step and the parts go there, however far. Move to step… (Alt+T, also on the menu on a part) does the same with the step's number typed: Alt+T, 17, Enter. Each is one Undo, and the booklet follows.
With LDCad's keys, Page Up and Page Down go to the next and previous step while the timeline is up; with Studio's, Ctrl+D and Ctrl+A move the selected parts a step later and earlier there, as in Studio's step editor.
The timeline
B opens the timeline under the model: the build from an empty baseplate to the finished model. Left and Right step through it, Space plays it, and Home and End go to its start and end. Its buttons are Earlier, Later, Merge with next, Delete step, New step from selection and Move to step…; click a step in its row of steps to go to it.
The author's steps
A model made in Studio, LDCad or LeoCAD keeps its author's own steps: the timeline opens in Author's steps, and the booklet follows them.
The booklet
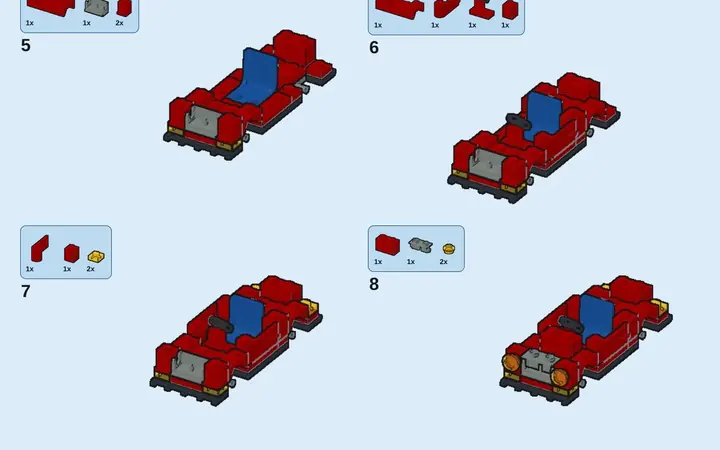
Build › Instructions… (or Instructions on the toolbar) lays out a booklet from the steps, as a set's is: a cover, each step's picture with the parts it adds in a box, sub-assemblies built in callouts beside the step they go on, and the parts list at the back. It opens in its own tab, ready to print.
Each step by hand
The timeline's Booklet row, or Build › Booklet page, changes how the step the timeline is on is printed: turn the view, look from higher or lower, use the window's view, zoom in or out, bigger or smaller on the page, start a new page or have a page alone, show its parts box or not, build its sub-assembly in a callout, and how many steps go on a page. Outline new parts outlines each step's new parts in orange.
On a step inside a callout, Turn left, Turn right, Higher, Lower, This view and Usual view turn that step's picture alone, from the way the callout faces, and the steps after it in the callout until turned again. The turn is saved in the sub-model's file as a ROTSTEP, as LPub reads it.
Real size, colours, pulled out and finished
The first step to use each straight Technic axle or beam shows it at its real size in a box under the step number, with its length in studs in a ring. Lay the part on the printed page to check it. It prints true at 100% scale in the PDF and the PNG pages.
On Build › Booklet page, for the step the timeline is on:
- Pull out the selected parts draws them 2 studs out, the way they go in, with a red arrow pointing back in. With nothing selected it pulls out all of the step's new parts.
- Colour guide lists the step's colours under its number.
- 1:1 guide puts the selected parts at real size. On a step that has a guide, it takes the guide away.
- Sub-model preview shows a sub-assembly that is built on its own pages finished, on the first of those pages. It is on until you turn it off.
Press a command again to put the step back as it was. Each change is one Undo and is saved with the model. Claude can set each one with edit_booklet.
Lay a page out
Lay out the page… on the Booklet row puts the page in your hands: drag its picture, parts list, callout and step number where they go, and a corner to size each. Add words, Add a picture…, and Draw an arrow: drag it, drag its middle to bend it, and set its colour and width. A callout's own pages turn with Previous and Next page.
Words or a picture turn by the round knob above them (it settles on every 15°), or type Turn in degrees; Opacity fades them. An arrow bends through as many points as you like: drag the dot in the middle of any stretch to add a bend, and double-click a bend to take it out. Drag a guide out of the ruler along the top or the left; what you drag near it lands on it, and dragging the guide back into its ruler takes it away. Guides are never printed. The PDF and the PNG pages print each turn, fade and bend as the page shows it. Words or a picture turned beside something else are kept off it by their turned outline, as the page draws them.
Claude can do all of it for you over the connector: turn and fade words or a picture, bend an arrow through points, lay guides, and turn a callout's step. Each is one Undo.
Laid out one page the way you like, press Apply to later pages: every later page with as many steps gets the same layout, its picture where yours is and drawn no larger than the booklet draws a step, and moved clear of a parts list that grew for a step of many parts. One Undo takes it all back. Set Per page first so the pages have the same number of steps.
Save it
Beside Print, the booklet has Save as PDF and Save pages as PNG, a .zip of a picture a page at 300 dots an inch. The PDF carries its own type, so it reads the same on any computer.
On the website
A shared model's page has its booklet and Build it, the step player: see A model's page.