Instructions and exports
Exports and renders
Every file Brickworks saves, from LDraw and Studio files to 3D models, pictures, shopping lists and photo-real renders.
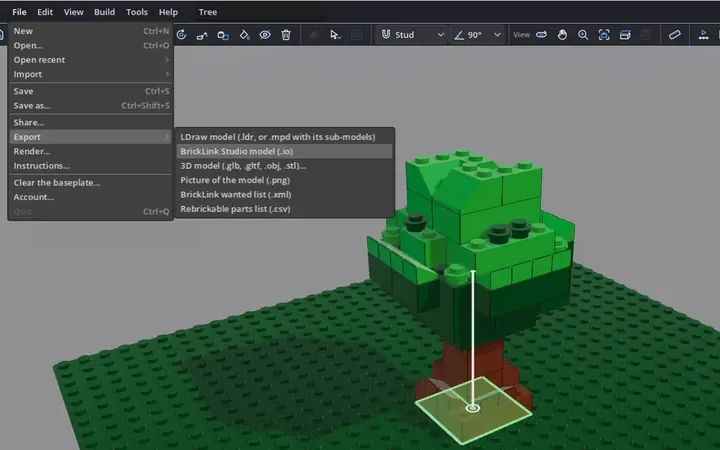
File › Export has every format. On the desktop each asks where to save; in a browser it downloads.
| Export | What it is for |
|---|---|
LDraw model (.ldr, or .mpd with its sub-models) | The open format: LDCad, LeoCAD, Studio and every LDraw tool read it |
BrickLink Studio model (.io) | Open it in Studio, with its steps |
3D model (.glb, .gltf, .obj, .stl) | Blender, AR, a 3D printer |
Picture of the model (.png) | A picture with nothing behind the model |
BrickLink wanted list (.xml) | Buy the parts on BrickLink |
Rebrickable parts list (.csv) | Buy the parts, or check them against your sets on Rebrickable |
All my models (.zip) | Every model saved here, as LDraw files: a copy of your own |
Parts lists for shops
The parts list (P, or Build › Parts list) counts every part by colour. The BrickLink and Rebrickable exports group them by lot, the way shops sell them; with your collection set, what you own is taken off first.
3D models
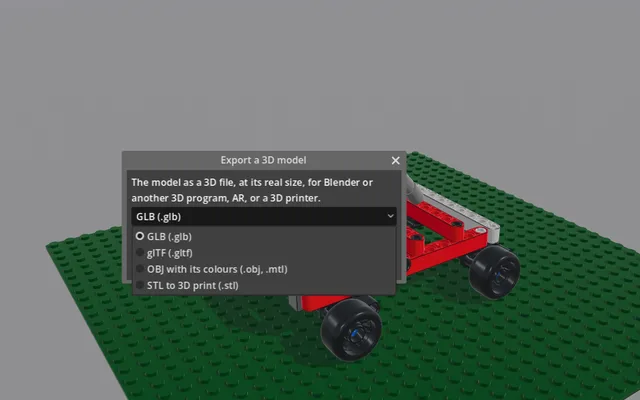
3D model… writes the model as glTF (.glb or .gltf) in its colours, OBJ, or STL for a printer, each part with its real shape.
Render
File › Render… (or the toolbar's camera) makes a picture of the model worth keeping, a turntable, an animation of one of its motions, or a video of it being built. The picture on the left is a quick draft of the render, drawn again every time a choice changes, so what comes out is what you looked at; Render only makes it better. A render runs a piece at a time, with its progress on the bar and Cancel (or Esc) to stop it; when it is done it downloads, or on the desktop goes to Downloads.
The choices are a photographer's:
| Choice | What there is |
|---|---|
| Quality | A quick one in the window's own look, up to Best: path traced on a graphics card that traces rays, so shadows soften as they should, light bounces off the floor and between the parts, and glass tints what is behind it; elsewhere frames averaged for soft shadows from an area light, smooth edges, shading under every ledge, and depth of field |
| Look | As in the window, or Product (below) |
| Size | 720p, 1080p, 4K, Square, or Custom |
| Backdrop | White, Gradient, Grey, Dark, a Colour you pick, or None (a transparent picture), with a contact shadow under the model if you like |
| Light | Three lights, as in the window; or photographed light: a softbox studio, window light, or daylight |
| View | Three-quarter like the box, the view you are looking at, front, side, back three-quarter, low looking up, or from above |
| Lens | The focal length, and an aperture from Off to f/2 for depth of field (blur comes with Best) |
Best, path traced
On the desktop app, on a graphics card with ray tracing (most from the last few years), Best follows the light bounce by bounce over the model's own parts, lit by the light you chose. The picture gets cleaner sample by sample: Best's frames sets how many, 256 when you leave it to the app. The car at 720p takes a few seconds on a mid-range card. Where the card cannot trace rays, and in a browser, Best is frames averaged as before, and the Quality note says so. A transparent picture is frames averaged too, so its shadow can fall on nothing.
Render queue
File › Render queue… lines pictures up and draws them one after another while you go on building. Add this view queues the model and the view as they are now, with Render's settings; change the view, or the model, and add another. Each is drawn in turn, saved where Render saves under a name of its own, and shown in the status bar, whose Cancel stops the one being drawn and pauses the rest. Finish now keeps a path-traced picture as clean as it is so far. Claude can use the same queue over the connector (render_queue).
The Product look
Product draws the model as a set's own pictures are: glossy plastic with rounded edges and studs, clear parts you see into and through (their own walls and tubes, and what is behind them, in their colour), and a studio's key, fill and rim light, with film-like tones. Black parts stay black and every colour stays true to its LDraw colour. It goes with any backdrop; at Best, with an aperture set, depth of field softens what is out of focus.
Animation
Animation plays one of the model's motions, or all of them in order, and keeps every frame as an animated WebP, at the quality, size, light and lens chosen for a picture. The camera stays as you see it, or is framed on what moves.
Building
Building renders the model going up: the steps the timeline shows, one after another, each step's parts coming down into place, while the camera turns slowly round and ends on the view you chose. Pick a length (10, 20, 30 or 60 seconds) and press Enter, or Render building. It is kept like a turntable: an animated WebP, and on the desktop the frames and an MP4.
Booklets
The building instructions save as a PDF or as PNG pages: see Instructions and booklets.